|
Vans RV7 2005 Build Diary
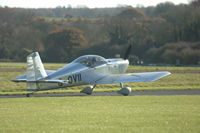
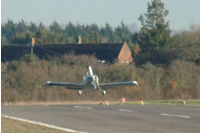
After 20 months of building, G-OVII lifts off -
13:40 on 18th November 2006 - into the air for the first time. The
sight was incredible as almost two years of work came together. Read
all about it here.
Just over an hour in the workshop tonight. Fitted the fuel and oild pressure
block and sensors. Fitted the cable clamps, and cut two holes in the
firewall for cables. Fitted AF-2500 to instrument subpanel.
Riveted center section of instrument sub-panel in place, and refitted engine.
Christmas is over, and Jo has got me lots of bits for my RV project and some
tools - she is great. Topcoat painted the instrument sub-panel, panel
brace and started to rivet it into place.
It's the week leading up to Christmas, so my time is taken up shopping and
Christmas parties. It the moment I am held up waiting for very small
odd parts to arrive. When they do I then seem to find I am missing another
small part - stopping me from continuing! However I have pushed on with
painting the instrument sub panel as I want to rivet it in place and
start fitting wiring.
It's been a busy week, on the run-up to Christmas. Office Christmas party
and work around the house has only enabled a few hours in the workshop.
I have also been waiting for parts to arrive so this week I have been
completing a few 'odd' jobs.
Rather busy weekend - but not on the RV Project. Sunday removed engine and
frame to work on the firewall. Also had to make some adjustment to the
prop govenor.
Working through the FWF parts to ensure they all fit properly. Fitted alternator
- was suprised to find the Vans alternator is not a new unit. It appears
to be reconditioned!! Have a look at the close-up pictures the rear
casing is all bashed around and has been repainted. Looks really horrible
on my nice new engine!!
Contiuning work on plumbing the engine. Fuel lines, fuel pressure, oil temp
sender and route of mag wiring. I have noticed a lot of the engine work
will be held up - or cannot be varified as correct - until my cowels
are fitted, which cannot be fitted until my propeller and spinner is
fitted. I have decided to go for the Hartzell HC-C2YR-1BFP/F7496-2,
supplied through Vans, its going to be 8 weeks waiting, the spinner
they supply is fiberglass so I decided to see if Hartzell did one, they
do - 836-60 or 836-60P. It will be metal rather than fiberglass. $1'874!!!
Think I will be fitting the $160 fiberglass Van's one........
After a disapointing Sunday this evening has gone better. I have done some
research and have come a long way to resolving my engine fitting issues.
I thought it was a good idea this evening to check the fitting of the
exhaust as soon as possible in case of any issues, glad to say it all
fits.
Sunday - Not such a great day today. It started well when I decided
to take the fuse out of the garage and fit the left wing. I have now
discovered I have the wrong Fuel Injection Servo.
Yet another big day!!! - Saturday, went to the airfield this morning. Far
to much water about to fly so back to the workshop and fitted some parts
to the rear of the engine then fitted the engine. I fitted it in
under 2 hrs on my own!
|
Another big day - offered up the engine to the frame to see were the controls
may need to come through the firewall. All seems well so I have decided
to put the fuse on it's wheels.
Really big day engine arrived - Jade Air delivered my Superior IO-360
engine this morning.
Refitted canopy this evening to check the space behind the instrument panel.
Jo came and helped fit the canopy then we played flying........
After a really bad week I am finally able to get back to my RV project. Building
aeroplanes is far more fun than fixing house plumbing problems, especially
when it involves the heating and it's in minus figures outside! I have
finally planned what circuits to have on the RV, so I decided to continue
the panel work by drilling the switches and circuit breaker holes. I
also completed the map box. Fitted the throttle, prop and mixture controls.
The shorter lead arrived from Advanced for the AF2500 engine monitor.
Weather still bad, so it's just a few hours at a time in the workshop!
21st November 2005
Checked all brake pedal lines. Planned Instrument circuit braker layout. Didn't
do much more it's 27F outside tonight - workshop is not much above that!!
Today I decided to complete my parking brake. I have already made the bracket
but needed some brake line parts to continue - so it was shelved for
a while. The parts arrived with the firewall forward kit. As it's being
mounted on the firewall and the brake lines come through the firewall
I figured it was as good a time as any to finish the job. Even though
I say so myself I am pleased with what I have done.
Started work on the firewall. Fitted batterybox, master and starter relay's.
Fitted various nutplates on firewall.
The right wing is now complete. Again Jo came out and helped me pack it away
into the roof of the workshop. Started on the firewall forward - battery
box. It's really cold this evening so just an hour in the workshop.
My firewall forward kit arrived from Vans. It's like Christmas has come early!!
Jo came out to the workshop this evening and help move the wings around.
I just have a few small jobs to complete on the right wing.
Decide to wait for the firewall forward kit to arrive from Vans before continuing
with the fuse work. I had been given a Duck Works landing light by another
builder and finally decided I would fit it.
9th November 2005 (Check)
Fitted left hub and wheel. It's really cold in the workshop this evening,
so I didn't do much more. Ordered the firewall forward kit from Vans
this evening.
Decided to fit the landing gear on the engine frame today. Quite a big milestone
the wheels going on for the first time.
It's the week leading up to Christmas, so my time is taken up shopping and
Christmas parties. It the moment I am held up waiting for very small
odd parts to arrive. When they do I then seem to find I am missing another
small part - stopping me from continuing! However I have pushed on with
painting the instrument sub panel as I want to rivet it in place and
start fitting wiring.
Fitted brake pedal hydraulic lines.
The fuel tap arrived from Andair this week so I have gone back to building
the fuel pump assembly. This needs to have 5" of straight pipe
in and out, so it's been a challenge to find a suitable location.
|
|
31st October 2005
Spent this evening fitting nutplates, dimpling and deburring the instrument
subpanels and parts. Planned layout of circuit breakers on the instrument
panel.
Time to pull sub panel out and fit the engine analogue box to the subpanel.
Spent the rest of the day fixing nutplates and deburring.
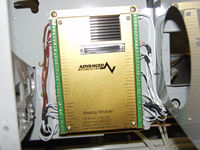
The location of Advanced Control Systems (AF-2500) analogue control box gave
me some challanges, originally I planned to fit it above the map box.
Building the map box. Vans supplies an optional kit to fit a map box kit to
fit to the instrument panel. I decided to fit the box for additional
secure storage and I plan to fit the Advanced Systems (AF-2500) analogue
control box on the top of the map box.
Continued work on the instrument panel. Made mounting brackets for GPS, radio
and transponder stack. Still trying to make my mind up about fitting
the additional brace next to the Dynon D100.
Worked on the instrument panel brace behind the Dynon D100.
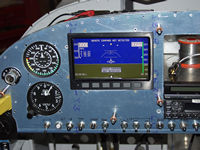
Pushed on with building the instrument panel. Fitted the Dynon D100, GPS
mount, ICOM Radio, Garmin Transponder and AF-2500 Engine Monitor.
I decided to take a break from the empannage. As it's cold outside - so I
decided to plan the instrument panel layout and make a (second) mockup
in MDF. Sunday. I am pleased with the layout so decide to cut the instrument
panel.
Continuing work on the empannage. Fitted nutplates to fuse. Re-fitted rudder
to check alignment of lower end cap.
Spent most of this evening fitting nutplates!
Friday evening, completed rudder leading edge. Saturday, fitted
the rudder for the first time. Sunday, I have managed to fit
nearly all the fiberglass finishers to the empannage (Rudder, HS &
Elevators). They need some filler to finish but its been a good days
work.
Just a couple of hours in the workshop this evening. I finished forming the
curve on the rudder leading edge. Then primed ready to rivet tomorrow
evening.
This evening I started to roll the leading edge of the rudder. It's bnot
easy and I need some help, so I decided to play with my intrument panel
mock up instead.
A BIG day today. I ordered the engine for the project and placed my deposit.
I could have it within two weeks but they will hold on to it until I
am ready for it. This evening I continued work on HS fairing.
Back on the project after a break. I now have the #6 screw countersink nut
plates, so I fitted them for the inspection covers. Continued work on
the HS fairing.
|
|
I have been away from the project for a while, and collected some parts for
the RV wile visiting Florida. John has helped and collected my parcels
ready for my arrival. I even managed to collect the new Dynon D100 Electronic
Flight Information System.
Worked on the finish strip under the HS.
This evening I drilled the elevator horns, fitted trim servo and control rod.
Riveted the trailing edge of the rudder. I had put this off for sometime
as it seemed very hard to get right - I needn't have worried. It went
well. I then fitted the left elevator and had a heart stopping moment
when I thought I had something really wrong.
Started to fit the empanage, so I can fit the elevators and rudder.
Just a few hours in the workshop, fitted rudder cables and steat belt cables
(as I was already inside the fuse!).
Today I decided to fit the firewall bulge. Also bonded rudder trailing edge
Worked on firewall this evening.
Finally finished painting the cockpit floor, stripped all the masking off
this evening. Removed the masking from the firewall and front of spar.
Looks nice now! Now reinstalling parts, started with rudder pedals and
brakes, then fitted the flap control bar. I won't be fitting the instrument
sub panels yet as I need to do some riveting on the firewall and the
fuse side skins.
6th September 2005
Repainted the cockpit footwell AGAIN. Yes, I was not happy with the results
last night so I have rubbed it all down this evening and re-painted
it again. So far it looks good, tomorrow morning will tell.5th September 2005
Repainted the cockpit footwell this evening.
My brother Andy (and his wife) visited this weekend. So he came and helped
out with the engine frame fitting. I had thought it was going to be
harder and heavier. Hence asking him to help, but it went on quickly
and easily.
Prep'ed and sprayed the cockpit footwell area, it didn't go very well I used
a different brand of cloth with the panel wipe and it left microscopic
fibres behind. So after sprying it looked like I had been through a
sand storm!
1/2nd September 2005
Worked on instrument panel design, I got some MDF to mock up the panel. I
don't have the Dynon D100 yet so I don't want to cut the original panel. |
|
30/31st August 2005
Another big day - offered up the engine to the frame to see were the controls
may need to come through the firewall. All seems well so I have decided
to put the fuse on it's wheels.29th August 2005
Really big day engine arrived - Jade Air delivered my Superior IO-360
engine this morning.
Refitted canopy this evening to check the space behind the instrument panel.
Jo came and helped fit the canopy then we played flying........
After a really bad week I am finally able to get back to my RV project. Building
aeroplanes is far more fun than fixing house plumbing problems, especially
when it involves the heating and it's in minus figures outside! I have
finally planned what circuits to have on the RV, so I decided to continue
the panel work by drilling the switches and circuit breaker holes. I
also completed the map box. Fitted the throttle, prop and mixture controls.
The shorter lead arrived from Advanced for the AF2500 engine monitor.
Weather still bad, so it's just a few hours at a time in the workshop!
Checked all brake pedal lines. Planned Instrument circuit braker layout. Didn't
do much more it's 27F outside tonight - workshop is not much above that!!
Today I decided to complete my parking brake. I have already made the bracket
but needed some brake line parts to continue - so it was shelved for
a while. The parts arrived with the firewall forward kit. As it's being
mounted on the firewall and the brake lines come through the firewall
I figured it was as good a time as any to finish the job. Even though
I say so myself I am pleased with what I have done.
20th August 2005(Picture)
Started work on the firewall. Fitted batterybox, master and starter relay's.
Fitted various nutplates on firewall.
The right wing is now complete. Again Jo came out and helped me pack it away
into the roof of the workshop. Started on the firewall forward - battery
box. It's really cold this evening so just an hour in the workshop.
My firewall forward kit arrived from Vans. It's like Christmas has come early!!
Jo came out to the workshop this evening and help move the wings around.
I just have a few small jobs to complete on the right wing.
Decide to wait for the firewall forward kit to arrive from Vans before continuing
with the fuse work. I had been given a Duck Works landing light by another
builder and finally decided I would fit it.
Fitted left hub and wheel. It's really cold in the workshop this evening,
so I didn't do much more. Ordered the firewall forward kit from Vans
this evening.
Decided to fit the landing gear on the engine frame today. Quite a big milestone
the wheels going on for the first time.
It's the week leading up to Christmas, so my time is taken up shopping and
Christmas parties. It the moment I am held up waiting for very small
odd parts to arrive. When they do I then seem to find I am missing another
small part - stopping me from continuing! However I have pushed on with
painting the instrument sub panel as I want to rivet it in place and
start fitting wiring.
Fitted brake pedal hydraulic lines.
The fuel tap arrived from Andair this week so I have gone back to building
the fuel pump assembly. This needs to have 5" of straight pipe
in and out, so it's been a challenge to find a suitable location.
Fitted brake pedal hydraulic lines.
|
|
Fitting the rear skin and rollbar. John (W) comes and helps out.
The rear skin has to be riveted in place before the angles (on seat brace
X section) can be riveted in place, otherwise you can get to the skin
rivets.
Topcoat time. I wanted toput the top coat on final skin before fitting. Hopefully
to make it easier.... but I still managed to get a few runs!
The mission today to prep and prime. This is where it started to go wrong....
as I manage to dent the canopy skin. It's a write off.
Primer time - I have dismantled the rollbar, canopy and the rear fuse ready
for painting.
21st July 2005
Starting to think about the avionics. The panel layout and area behind needs
to be planned.
Started fitting the canopy rear catches..
18/19th July 2005
Dimpling the final rear skin, and prep ready to start spraying..
The rudder has some blind rivets that stand proud from the skin. It's bugged
me for a while, so this morning I decided I could not look at them any
longer.
A few hours over the past few days, continued working on canopy. Fitted struts.
Finished cutting the rear window, made final trim. Started on canopy side
strips.
Continued work on rear window, drilled all fixing holes.
Started fitting rear window.
DID IT - cut the canopy. I had to do it sometime and as it was warm
and sunny today I went for it. Heaters on, marked it out and started
cutting..
Finished riveting the canopy frame together, ready for the perspex now.
Still working on the canopy re-enforcement.
7th July 2005
Continued with re-enforcement.
Started work on the canopy re-enforcement option.
All holes drilled for canopy frame.
Worked on trim servo mounting - fuse.
Started on the canopy strut brackets.
|
|
Worked on canopy latch & tidied workshop this evening.
Continued work on the canopy - Fitted canopy side rails.
Continued work on the canopy frame.
Fully drilled the front pivot's for the canopy tonight. Had to also adjust
the top panel so it didn't catch the front edge of the canopy skin..
Continued work on canopy frame. Fitted the first rivets, the canopy is coming
together.
Made canopy release catch. Started fitting the canopy frame.
15th June 2005
Cut the canopy release hole in the side of the fuse..
Went flying today and collected some extra nut plates from Robert, all fitted
by late afternoon.
Back from Colmar - straight into the workshop!!!
Riveting and dimpling rear skin and brace. Also thinking about where to fit
the strobe power pack, under baggage floor or behind seat?
Riveting in the center (seat brace) bar, also finished the last recline position.
Worked on trim servo mounting - fuse.
Just an hour working on the RV this evening. Fitting pedals.
|
|
Brake pedals and fuel vent line.
Fitting tail wheel spring bracket and final bulkhead.
Mostly preparation and painting.
Just a few hours in the workshop this evening, finished assembly of the rolloverbar.
I want to get some more parts complete for another batch of spraying.
Continued work on fitting HS and VS, trail wheel mount is ready to prime and
fit. Prep work for more priming. Jo came and took some pictures of me
working on the VS.
A good day in the workshop today, continued with fitting of the empannage.
Started fitting the HS tonight, Jo came out and helped with the measurement.
Some work on the canopy mounts. Started making brackets to fit empannage.
Collected top coat paint for cockpit area.
Another evening in the workshop, reviewed my painting from lastnight. Still
waiting for my flaring tool to arrive from the US so decided to fit
the nutplates to the center floor vents and fuel pump mount.
Spraying front half of cockpit interior. Updated the Painting Page, bigger
pictures and added details about paint being used.
15th May 2005
Popham RV Fly-in. Got back and tidied workshop.
Left wing, tank bracket and finishing strip.
Right fuel tank bracket, and fuel tank breather.
Right flap control rod.
Fitted right flap to wing.
A really big milestone this evening. John (RV6 builder) came over and
helped with the wing alignment.
Jo helps with the trial wing fitting. The first wing is mated to the fuse.
Tomorrow John has offered to come over and help with the alignment.
Started work on front section of canopy - the hinge to front fuse.
A little work on the canopy release mech..
More work on fuselage, canopy rollbar to rear fuselage brace (the modified
version from Vans). Flap control rods.
Tony & I fitted the final wing skin today, completed in approx 2hrs.
|
|
Started fitting the final wing skin.
Fitting Fuel pump and filter housing in fuse.
Fitting rollover bar to fuselage.
Building brackets to fix rollover bar to fuselage.
Painting tonight, and riveting rollbar together.
Rest of the parts arrived - damaged. Start work on rollbar with replacement
parts.
Part of my order arrives from Vans.
18th April 2005
Continued work on flap.
Fitted aileron and started fitting flap.
Continued with wing, aileron brace and drilled pitot today.
14-15th April 2005
Aileron hinges complete and riveted on wing.
Wing, aileron hinge.
Started work on left wing, match drilled aileron hinges and wing skin.
10th April 2005
Jo helped me get the left wing down (stored in roof of workshop) to start
work on it. 9th April 2005
Cleaned and tidied workshop.
Fitting canopy latch.
Fitting building the canopy hinges.
We have finished the wing. Jo has written about working on the RV.
Jo helps with a few more rivets on the wing.
Jo is fantastic. She arrived in the garage today, and asked if I wanted help
fitting the wing skin. Jo has never riveted so I gave her a quick lesson
and then we started on the wing skin. Jo did a great job taking lots
of care to ensure the job was done properly. The skin looks great. Thanks
Jo.
Today I finished one elevator, I had left finishing the skin so the rivets
could be inspected.
|
|
Riveted baggage floor. Also managed to fit a few wing rivets. Will hopfully
have some assistance at the weekend.
Sprayed parts, a few more rivets in the wing skin and started fitting the
fuse baggage floor.
Started riveting the last wing skin on, it's not going to be possible to
do it on my own.
I find a problem with the rollbar I have been working on.
Painting.
26th March 2005
Deburring rollbar.
Fitting top skins to rear and front deck.
Working on the rollbar.
Building the rollbar.
Starting the canopy rollover bar, making the brackets.
20th March 2005
Seat back brace. Canopy latch work on fuse.
Fitting angle round top of instrument panel.
Cockpit, forward fuselage.
Some odd jobs....
Control rods.
Interior.
Fitting flap motor.
Aileron rods & rod ends.
Fuse interior.
Pedal fitting.
First fitting of the centre cabin cover and fuel tap housing.
Flap motor assembly, and luggage floor.
Building flap motor assembly, Aleix is helping.
Aleix came over and helped shoot the last rivets in the seat backs and tunnel
cover.
Really great progress this evening. Riveted the seat backs, brake pedals,
seat braces, tunnel cover and elevator bell crank. Very pleased with
progress tonight.
Spent the evening painting (primer), wing panel, and seats.
|
|
28th February 2005
Made tunnel cover, prepared parts ready for spraying (Snowing outside workshop
this evening!).
Built seat brace, dismantled and de-burred seats ready for primer. Dismantled
brake pedals for priming.
Building the seats.
I have decided to make the parts for the seats while I am wait for my right
wing to be inspected.
23rd February 2005
Deburred rudder pedals... .
Deburred rudder pedals, and reviewed parts for rudder assembly.
21st February 2005
Started drilling tail wheel bracket - WD-409. Too cold in the workshop came
in after 45mins (it's been snowing today).
Waiting for inspector to visit, so started on fuse - tail wheel.
Finished dimpling right wing skin, fitted inspection cover.
Started work on right wing skin.
Aileron control rod.
15th February 2005
Worked on aileron control road, fitting the 4-12 rivets was difficult.
Riveted flap hinge to wing.
Finished fitting the rivets to aileron gap fairing (W-724) that had caused
so many problems yesturday. Made spacers for aileron hindge. Made aileron
push rod (too short, will have to re-order). Painted aileron push rods.
Also visted Machine Mart for some more tools - which were nearly all
out of stock.
11th February 2005
Started to fit rivets to aileron gap fairing (W-724) .... they were not very
good so I removed them and decided to call it a night!!
Fitted brackets to aileron, and trial fitted aileron to wing.
Started riveting outer aileron hinge bracket to wing.
Painted aileron hinge bracket abd W-721, started riveting aileron hinge bracket
together.
Trial fitted W-721.
Constructed the aileron hinge bracket assembly.
|
|
Started work on the right QB wing.
Built jig for QB wings, put right wing in jig.
Completed right elevator. Rolled elevator leading edges. Completed HS.
Started assembly of right elevator.
A full day (approx 7hrs) working on the RV today. Finished the left elevator
& trim tab.
This week I have been back working on the bathroom refit, so it's only weekend
RV work. Saturday today did 3hrs finishing off the elevator ribs. Replaced
a few rivets not up to scratch and started to fit rear spar.
A really good full day in the workshop, I completed the left HS stabilizer
skin and cleco in the rear spar into place. Then back riveted both the
elevators ribs in.
2nd January 2005
Went flying in my Cessna 150 EV to North Weald.
This morning I managed a couple of hours in the workshop to finish riveting
the top left front rib HS skin. Jo came out and took some pictures for
me - before the camera batteries went flat. Also had a few hours this
afternoon..!! (5hrs).
|
Images & text copyright GAPilot & Go-7. This mail is not connected to Vans Aircraft Inc. The contents of this mail is the opinion of the author, not Vans Aircarft, PFA, CAA of FAA. Please check all information is correct before you act upon it. |